A Lawns to Legumes Story
A recipient of a state Lawns to Legumes cost-share grant shares how she came to plant her pollinator garden. Lawns to Legumes, a program through the Minnesota Board of Water and Soil Resources, supports residents to create pollinator habitat in their yards.
I grew up on a small Minnesota farm and have always enjoyed being outside in nature. When I was a child, I would walk along the roadside ditch, collecting beautiful wildflowers to give to a local elderly friend, Mary. She loved the bouquets. While I visited, she would show me her small greenhouse with all her plants and flowers. She told me we would not have those beautiful flowers if we did not have bumble bees.
Last November I attended a local Rochester community ed class on pollinators and was saddened to hear about the rusty patched bumble bee being on the verge of extinction. I wanted to know more, and spent time over the winter learning about bumblebees, their life-cycle and their habitat. In February, I applied to Lawns to Legumes for a grant to help pay for putting in a native pocket planting. This was an added incentive to move forward with my wildflower garden, though I was already hooked on the mission of bringing back habitat for the rusty patched bumble bee and other pollinators.
Planning
I created a site map of my yard, checked out my current plantings, sun exposure and available areas for a pollinator pocket garden. I also attended a Lawns to Legumes Resilient Yards workshop (via Zoom conference call). It was a great resource. We broke up into smaller groups to talk with a professional landscaper, a master gardener and three others like myself. One very important consideration: location, location, location!
Towards the end of April, it was oh-so-very-hard to not uncover my perennial flower beds. But I had learned pollinators can use these beds for their nests. So I waited… and waited, week after week. I am glad I did. When I checked my perennials — lo and behold! — I found several ground bee nests. It was exciting to see the bumble bees go in and out! They were so delicate as they fluttered around the only flower blooming at the time, vinca. Then we got snow. So I was really glad I kept my perennial beds covered, which protected the flowers and the bumble bees.
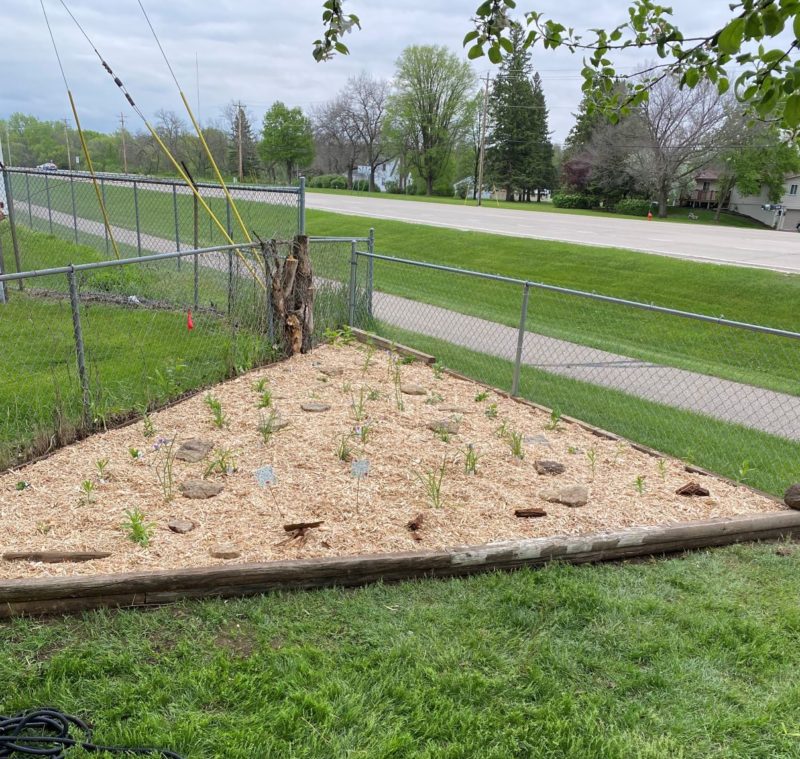
For the pollinator garden, I finally decided on a triangle-shaped plot in the sunniest part of the yard. To choose plants, I looked through the articles I had been reading for a pollinator garden with flowers for a sunny location. On the last day of April, I went to my trusted local greenhouse to buy them. (Truth be told, I could have waited to buy, as I didn’t plant until mid-May, and had to move the plants in and out daily.)
May planting
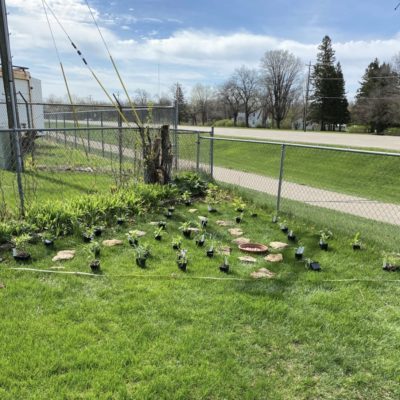 I marked off the pocket garden plot. Then I laid out the flowers in their pots on the plot to get a visual of where they would be planted. I took a picture so I would know where to plant them later on. I also called Gopher State One to have them check on any services buried in that area. I’m glad I called! Cable, internet, and power come in from that corner of our yard. But we were able to work around them.
My husband and grandson pulled out the sod. It was hard work! We put in wood edging using old landscape timbers, which made it look more like a flower bed and would help to contain weeds. Then it was time to fill it in. We added six bags of leaf compost, then two yards of soil — two trailer loads and then some. We put on landscaping fabric, cutting it longer on each end and stapling it to the outside timbers so it would stay in place and reduce grass and weeds. I know there will be weeds over time, but it will help the wildflowers to not have to compete for a few years.
We laid mulch chip bags on the landscaping fabric, with the flowers around and on top. This allowed me to walk/kneel on the bags so as not to compact the soil more than necessary. I cut holes in the fabric, planted, and watered the plants, then put mulch chips around them. Two pollinator signs from my daughter-in-law were the finishing touches. Overall, it took us one day to put in the pollinator garden.
The garden grows
At first it looked bare. I had planted the flowers as recommended, 1 to 2 feet apart. But I watered, and the weather cooperated by raining several times per week the first two weeks. Afterwards, I continued to water in the evenings. I found the mulch chips kept the moisture in.
 A few weeks later, the plants looked stronger and bigger. Some even had flowers. I have not seen any bumblebees around the pocket garden yet, but I know they will appreciate the flowers, which will be blooming until late fall this year.
I continue to see bumblebees in my other perennial flower gardens. I also mow our grass on the highest setting, allowing them to have a place to rest and some sweet clover to pollinate when my wild flowers are not blooming. I am looking forward to adding a rain barrel, and maybe a rain garden or two in the future. Now that I know the rusty patched bumble bees may come to my yard, I want to welcome them!
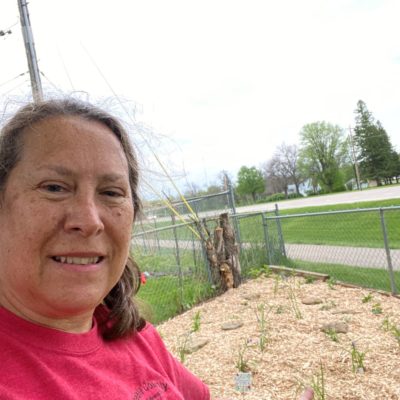
— By Sheryl McLaughlin
Sheryl’s Plant List
Plant |
Placement |
Bloom time |
| Butterfly Milkweed Asclepias tuberosa | full/part sun | June–Aug |
| Button Blazing Star Liatris aspero | full/part sun | July–Oct |
| Prairie Spiderwort Tradescantia bracteata | full sun | May–July |
| Grey Goldenrod – Solidago nemoralis | full/part sun | Aug–Oct |
| Wild Bergamot Monarda fistulosa | Full/part sun | July–Sept |
| Purple Coneflower Echinacea purpurea | Full/part sun | July–Oct |
| Joe Pye Weed Eupatorium purpureum | shade/part shade | July–Sept |
| Sky Blue Aster Aster oolentangiensis | full/part sun | Aug–Oct |