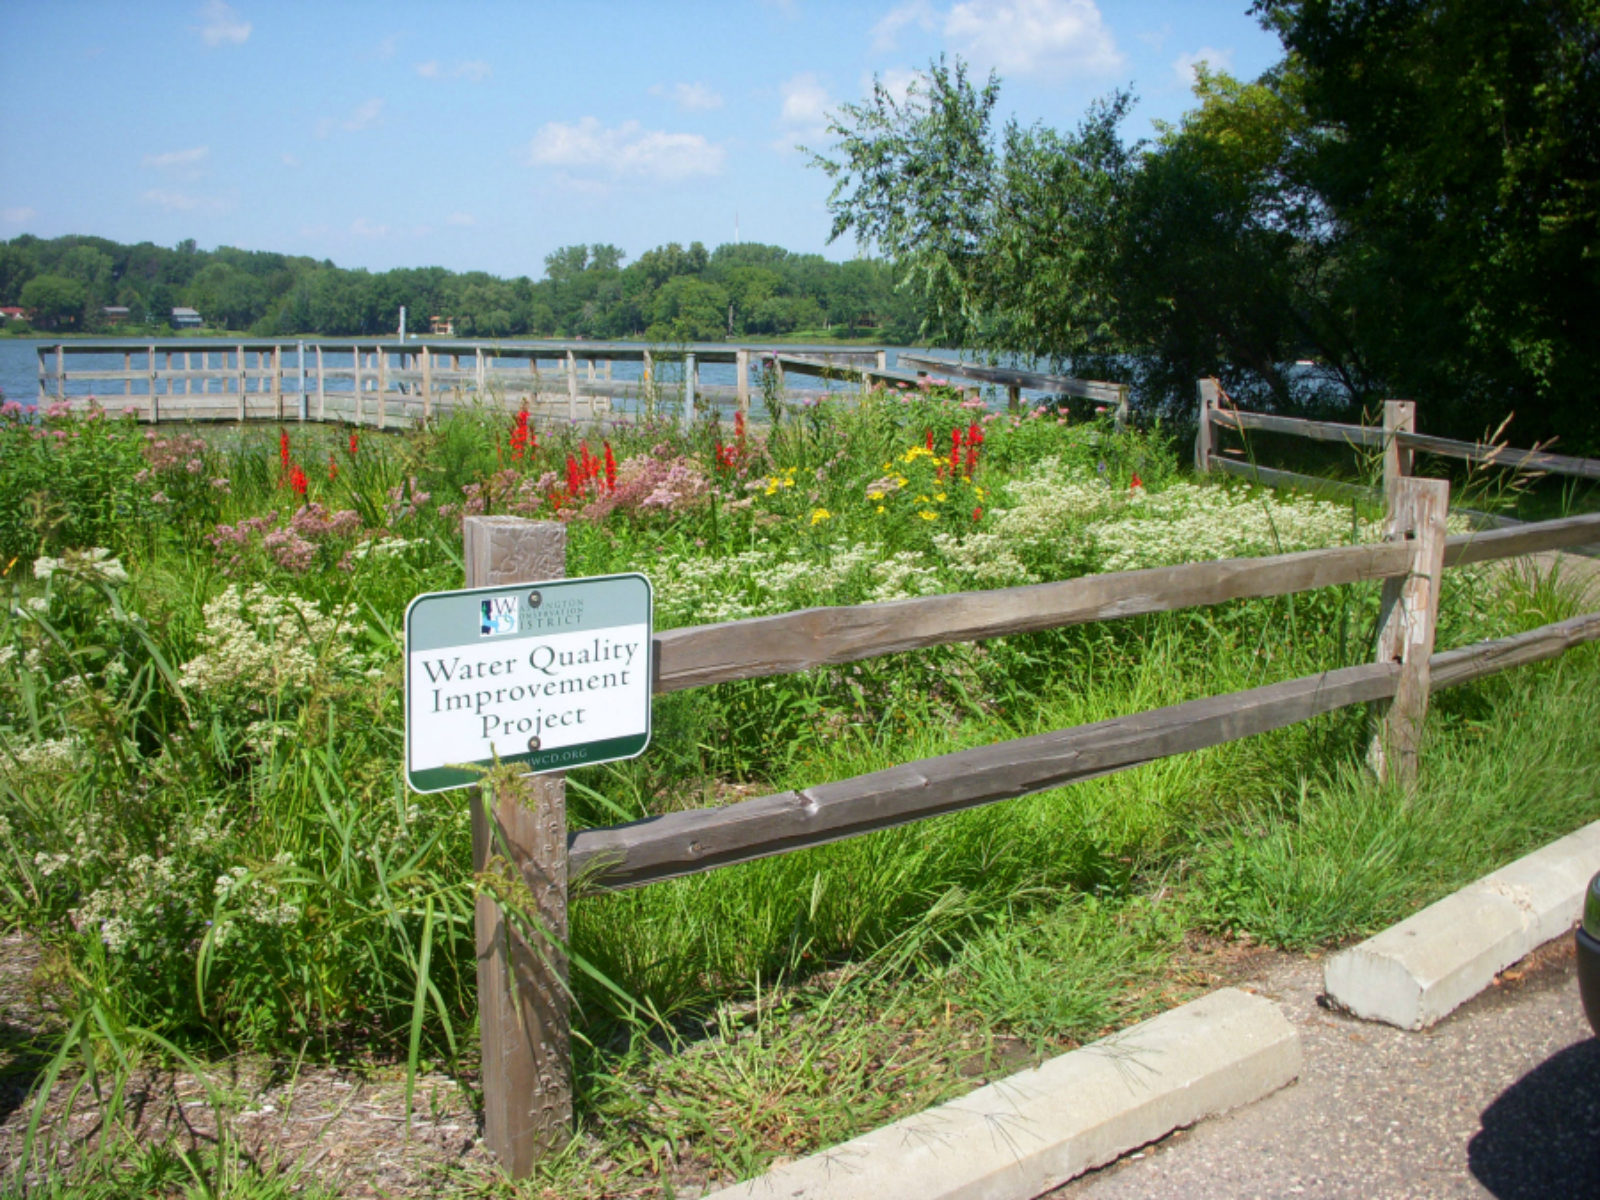
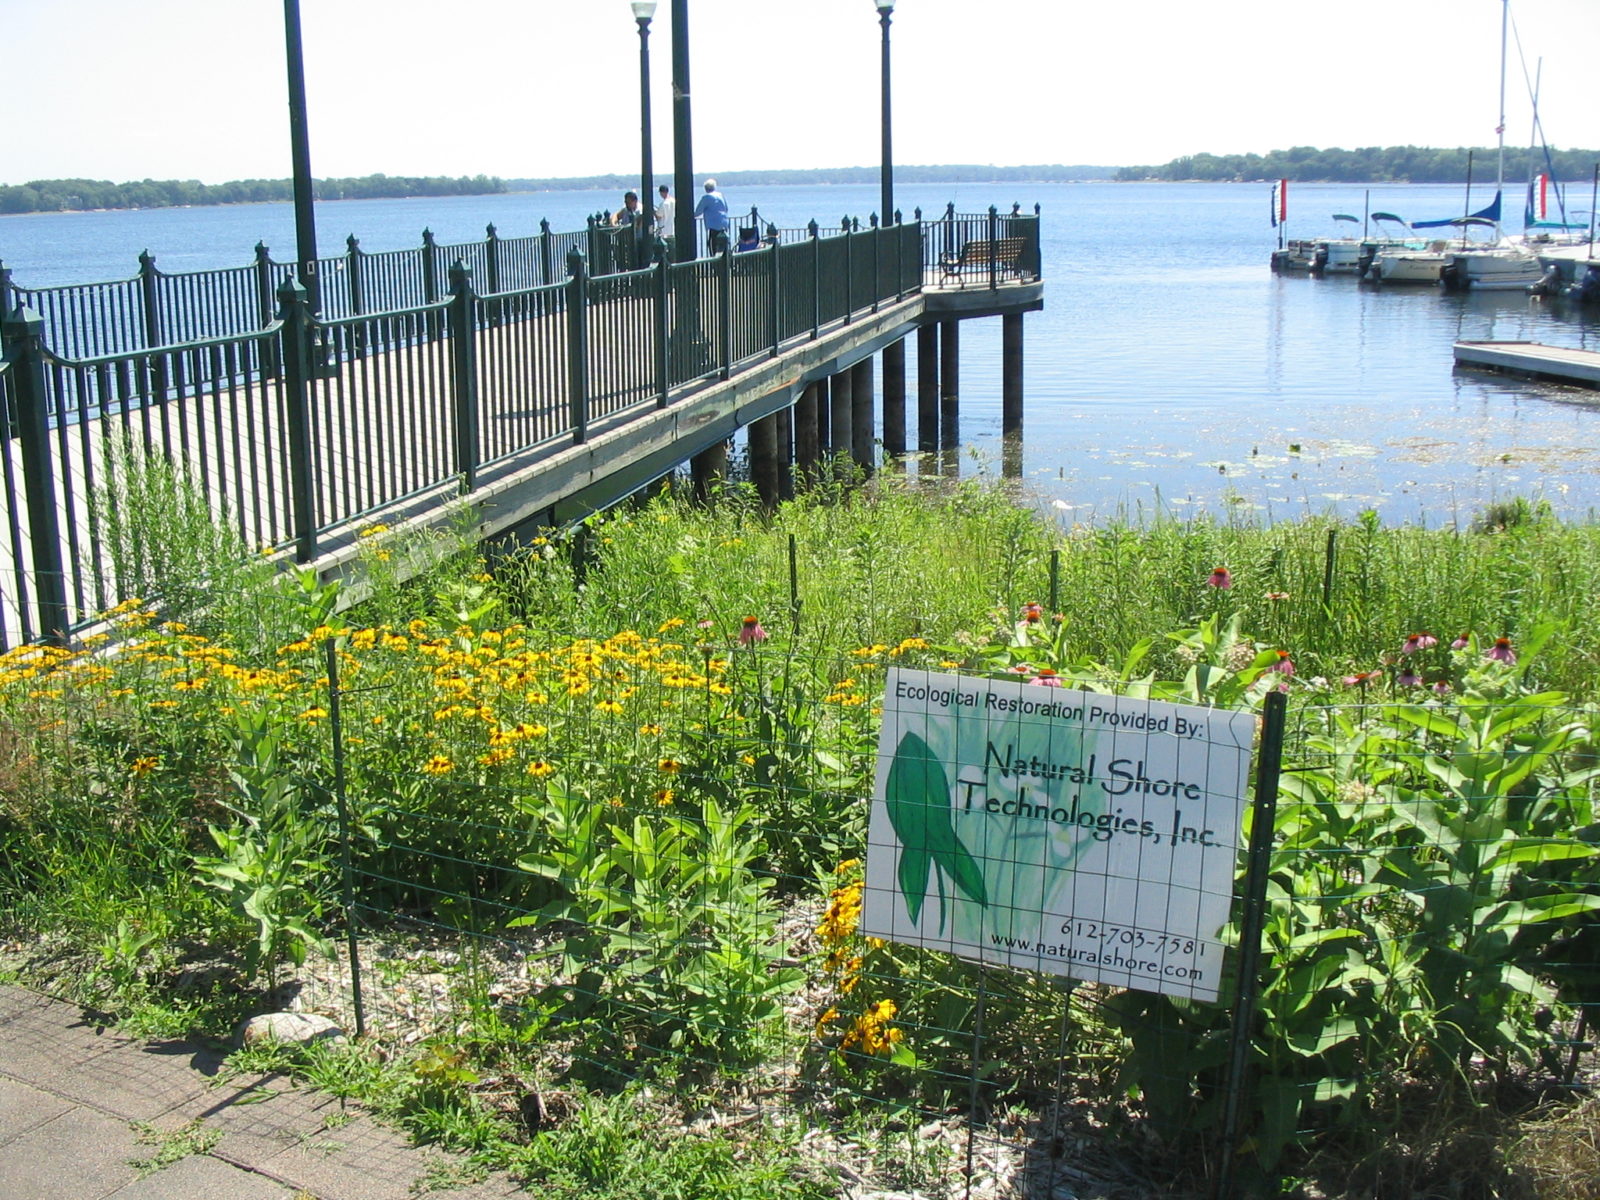
Shoreline Stabilization
Is your lakeshore eroding, unsightly or attracting too many geese? Does your lake water turn green each summer? Restoring your shoreline with native plants protects your shore and promotes clean water in our lakes. The roots of native plants filter and absorb polluted runoff and excess nutrients before they enter the water. What’s more, native plants anchor soil while beautifying your shoreline. The natural height and density of native plantings also deters geese that prefer turf. Encourage neighbors to join you in keeping your lake clean. After all, protecting the lake enhances everyone’s enjoyment while preserving property values!
For more guidance on installing your shoreline stabilization project, check out the Resilient Yards Online Learning Series.
Planning your shoreline project
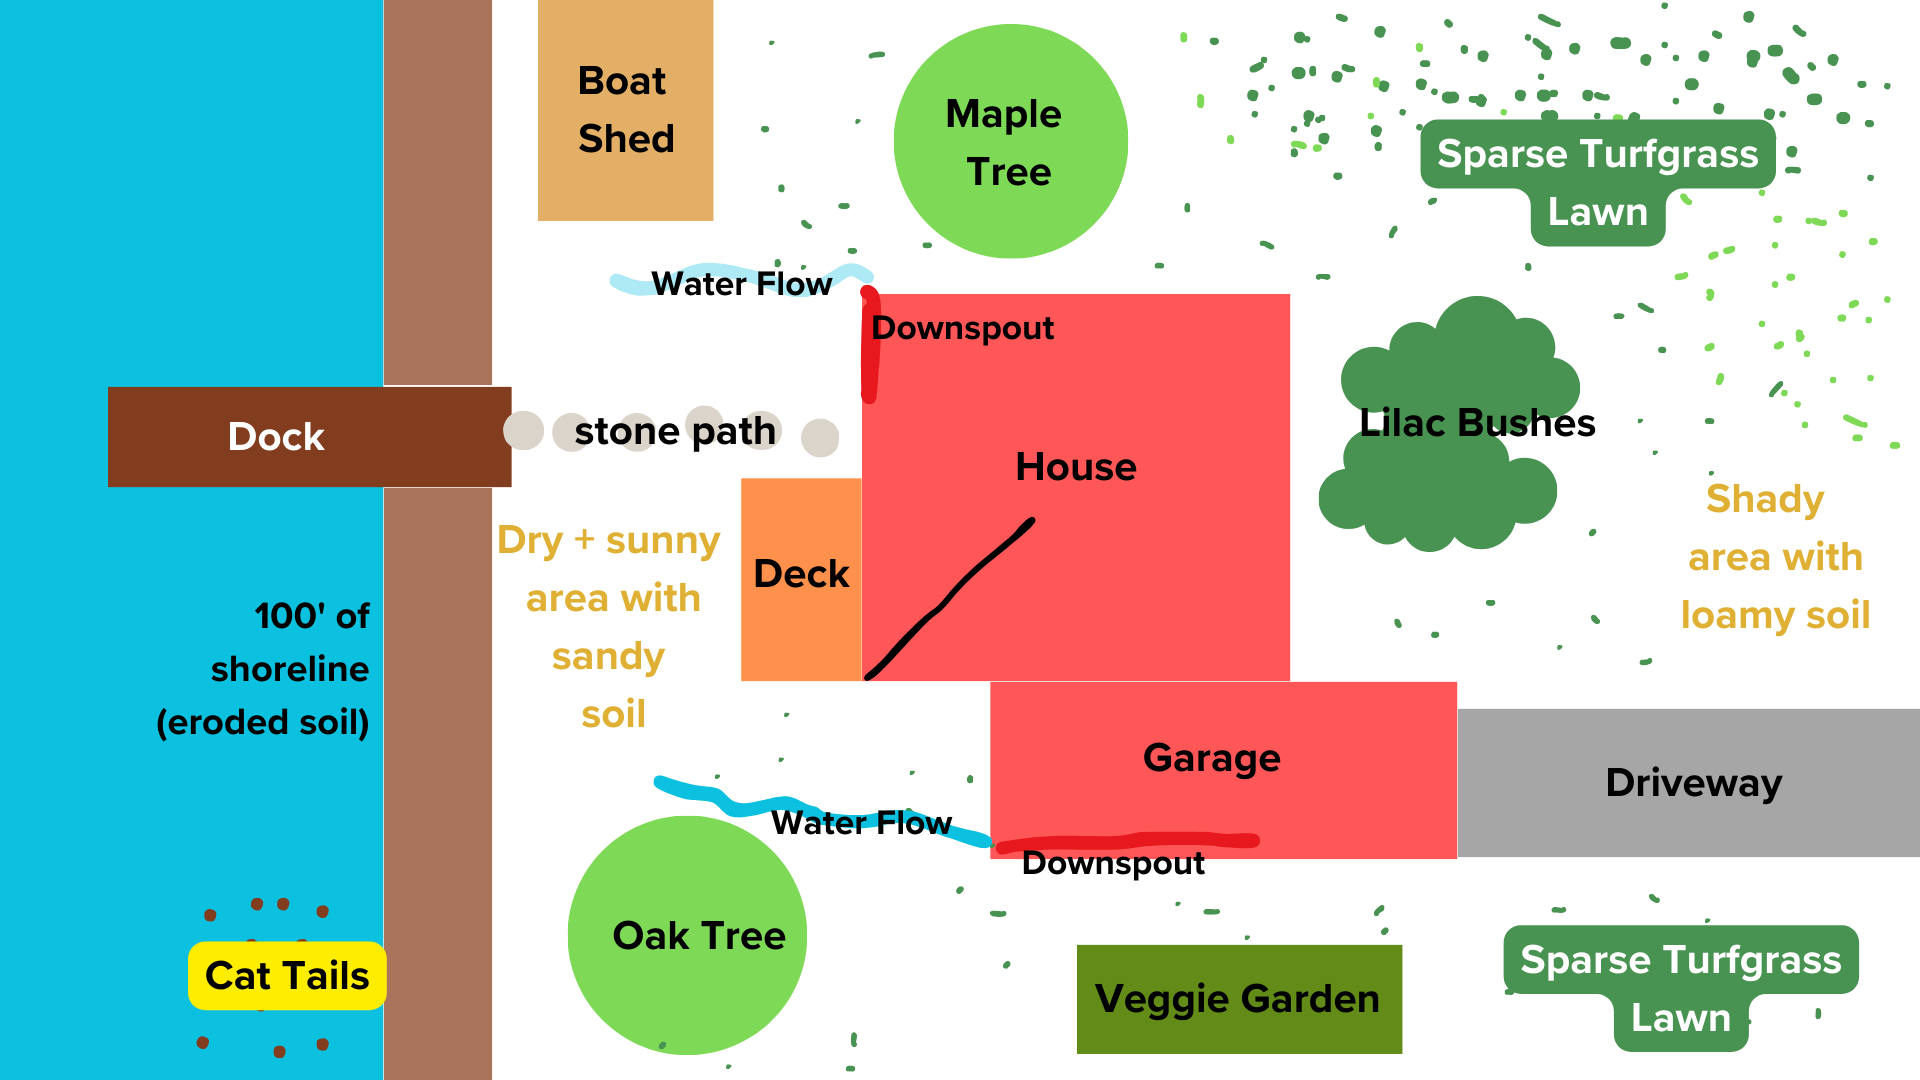
Conducting a site assessment is the first step of a shoreline restoration project. A site assessment helps you understand the health of your shoreline, what can be improved, and what to do next. This informs plant selection and clean water solutions for your property, and helps determine whether your project will be DIY or require more assistance.
 Use the DIY site-assessment guides in Blue Thumb’s Resilient Shorelines Planning Workbook to assess the overall health of your lake, the condition of your shoreline, and on-land factors that will impact your restoration project. Take your time to gather accurate information. Knowing as much as you can before you start your project may help you avoid costly mistakes later on.
It is very important to identify the Ordinary High Water Level (OHWL) before attempting to alter your shoreline. Any work done below the OHWL is subject to additional rules and permits in order to protect our lakes and shorelines. Contact your DNR Waters Area Hydrologist to determine your OHWL.
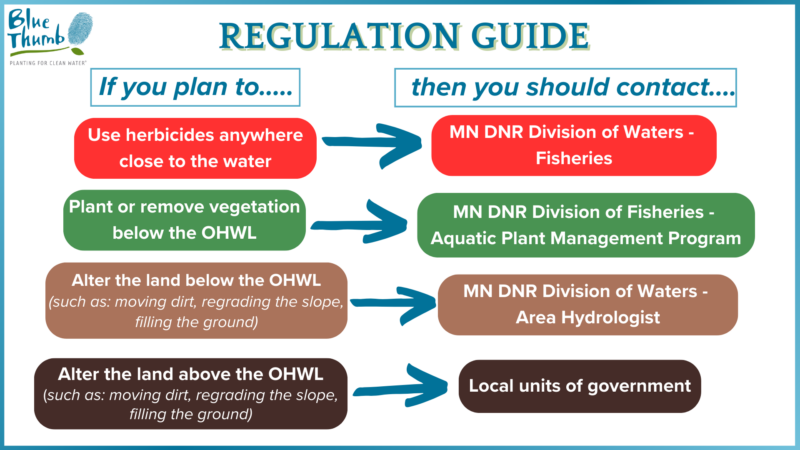 As exciting as planning your shoreline project is, it is important to make sure your plans abide by all of the rules and regulations regarding shorelines in Minnesota. Depending on the location and type of project you are planning, one or more permits may be required from various units of government.
There are four major entities you will work with regarding shoreline regulations and permits:(1) local government units like cities, counties, and townships, (2) watershed districts and watershed management organizations, (3) the Minnesota Department of Natural Resources, and (4) soil and water conservation districts.
A key step of assessing your site is creating a site sketch. A site sketch will show your existing site’s conditions and measurements, and will help you figure out how to incorporate your project goals.
Design considerations
There are two project types to consider within a shoreline project, a native buffer planting or full shoreline restoration. Check out the Blue Thumb Resilient Shorelines Planning Workbook for more information on the difference between these types of projects.
Some general advice as you plan your project:
- Familiarize yourself with the different plant zones on your shore (Upland, Transitional, Emergent, and Aquatic). These zones divide the shoreline based on the types of plants best suited for their growing condition.
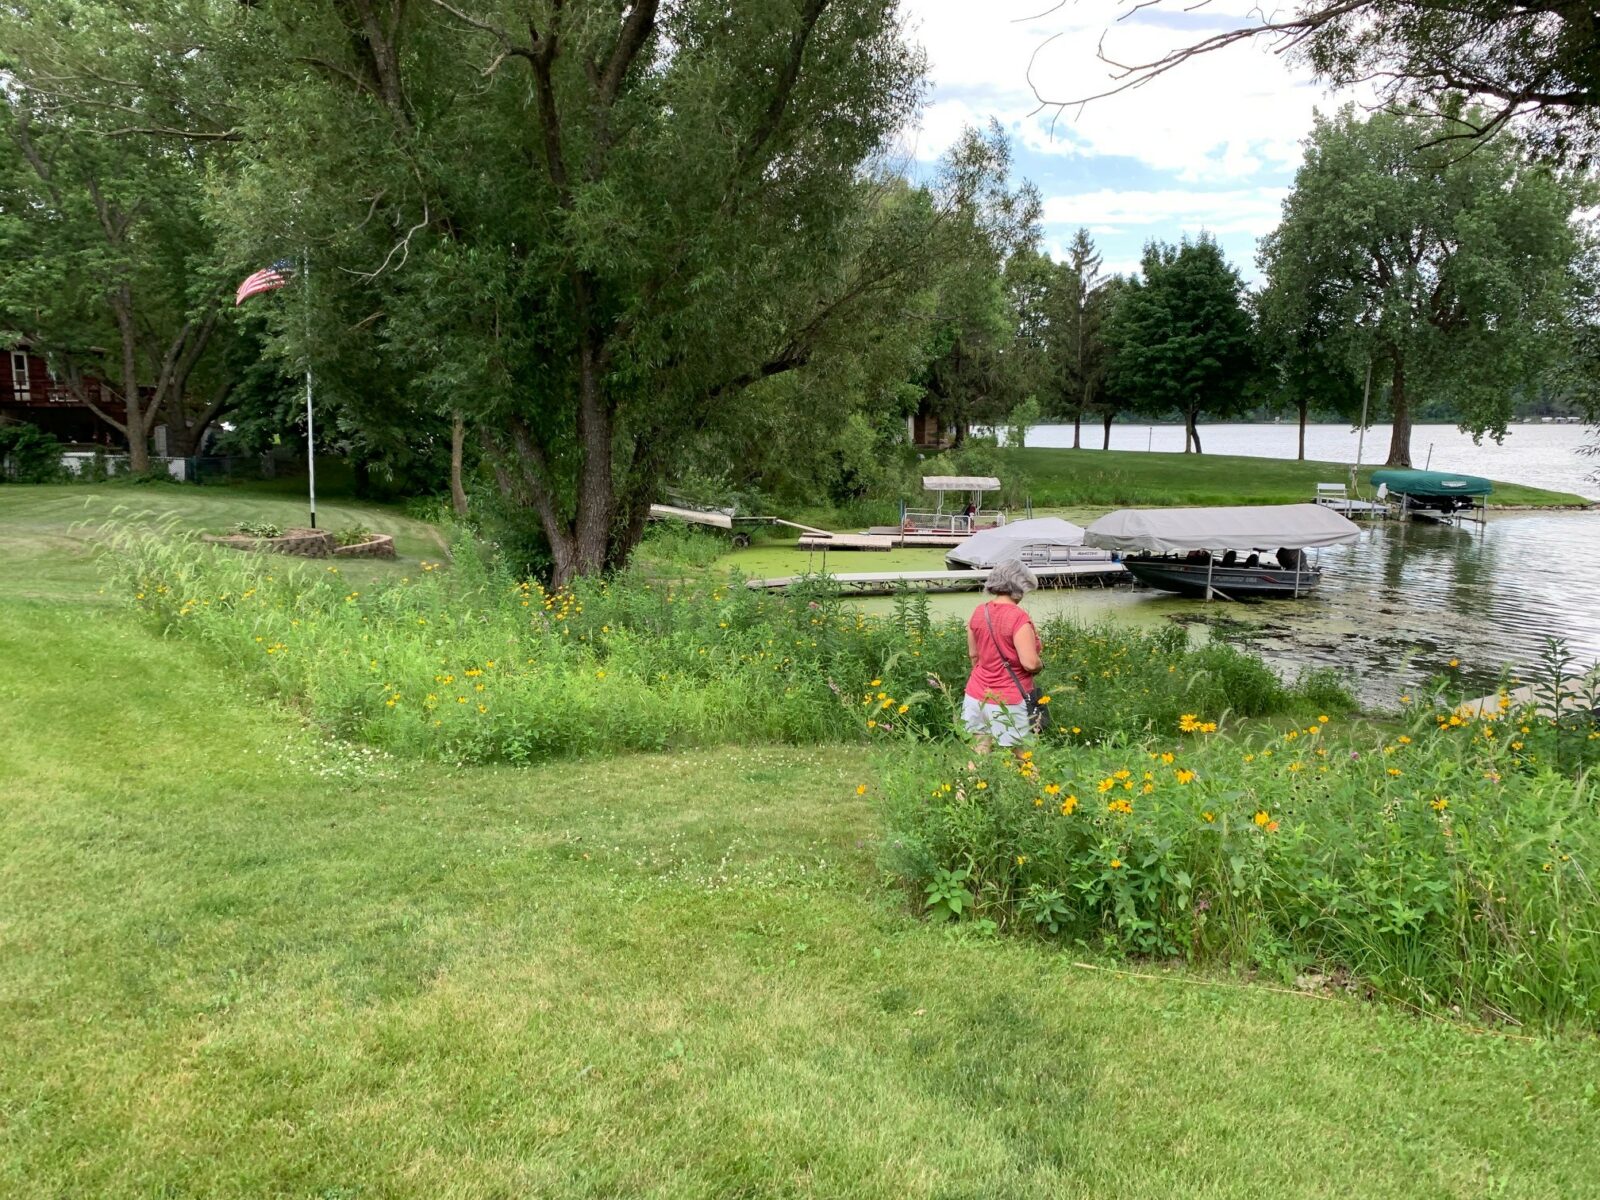
- Use grasses, flowers, and shrubs. We recommend planting 80% flowers and 20% grasses. Though native grasses don’t provide nectar for pollinators, they offer a host of other benefits: garden structure, ground cover, nesting sites, and foliage for beneficial larvae. Use shrubs as a simple solution to filling a large area. Native shrubs and grasses also have extensive root systems to help stabilize shoreline soils.
- Choose a diversity of native plants that bloom throughout the season. The rusty patched bumble bee and many other pollinators need blooming flowers from April to October. Flowers also add visual interest to a garden.
- Consider plant massing or “drifts.” Grouping the same species of plant together has many benefits: it helps you recognize what’s a weed and what’s not, has a higher visual impact, and makes it easier for pollinators to find the flowers in bloom. (Which is easier: locating a tray of freshly-baked cookies or tracking down individual crumbs?)
- Consider plant heights. Think of your garden as a family photo: put the cute little ones up front, and keep the taller ones in the back. That way, everyone can be seen and enjoyed!
- Install borders to reduce weed infiltration and display “intent”. Some people think native plants can look messy. A border made from mulch, stone, edging, or a low ground cover frames your garden and makes it easier for others to see the beauty you’re growing.
- Give it time. Native plant seeds may take months or years to germinate. Small plugs usually take three years to grow to maturity. Even larger plants can spend the first growing season establishing a strong root system before they fill out above the ground.
Use Blue Thumb’s Plant Finder to search for native plants that thrive in your site’s conditions!
Prepare your site
Before installing your planting, you will need to prepare your site. First, remove any sod in your project area. Some common methods for sod removal include:
- Hand digging, a quick but strenuous way to reach bare soil that’s ready to plant. You can do this by hand with a shovel (for very small areas), with a manual sod kicker, or with a sod-cutting machine (rentable from hardware stores). The sod and soil you remove can even be composted, shared with neighbors, or used to help regrade around a settling foundation.
- Sheet mulching, which requires less muscle but more time, involves applying a layer of cardboard covered with mulch to suffocate the grass beneath. You should first dig out invasive weeds like quack grass, creeping bellflower, and tree seedlings.
- Solarization works best with a mostly-sunny site and three months or more, but kills the toughest of weeds. It involves covering the area in a clear plastic sheet for several months (usually a whole growing season/summer).
Both sheet mulching and solarization kills the turfgrass underneath, which will slowly break down and add nutrients to the soil. Read more about these site preparation methods and other options in the Xerces Society’s Organic Site Preparation guide.
- Once the sod is removed, you will want to turn, loosen, and rake the compacted soil. This will make it easier to dig and plant your plants, while also allowing their roots to grow and expand.
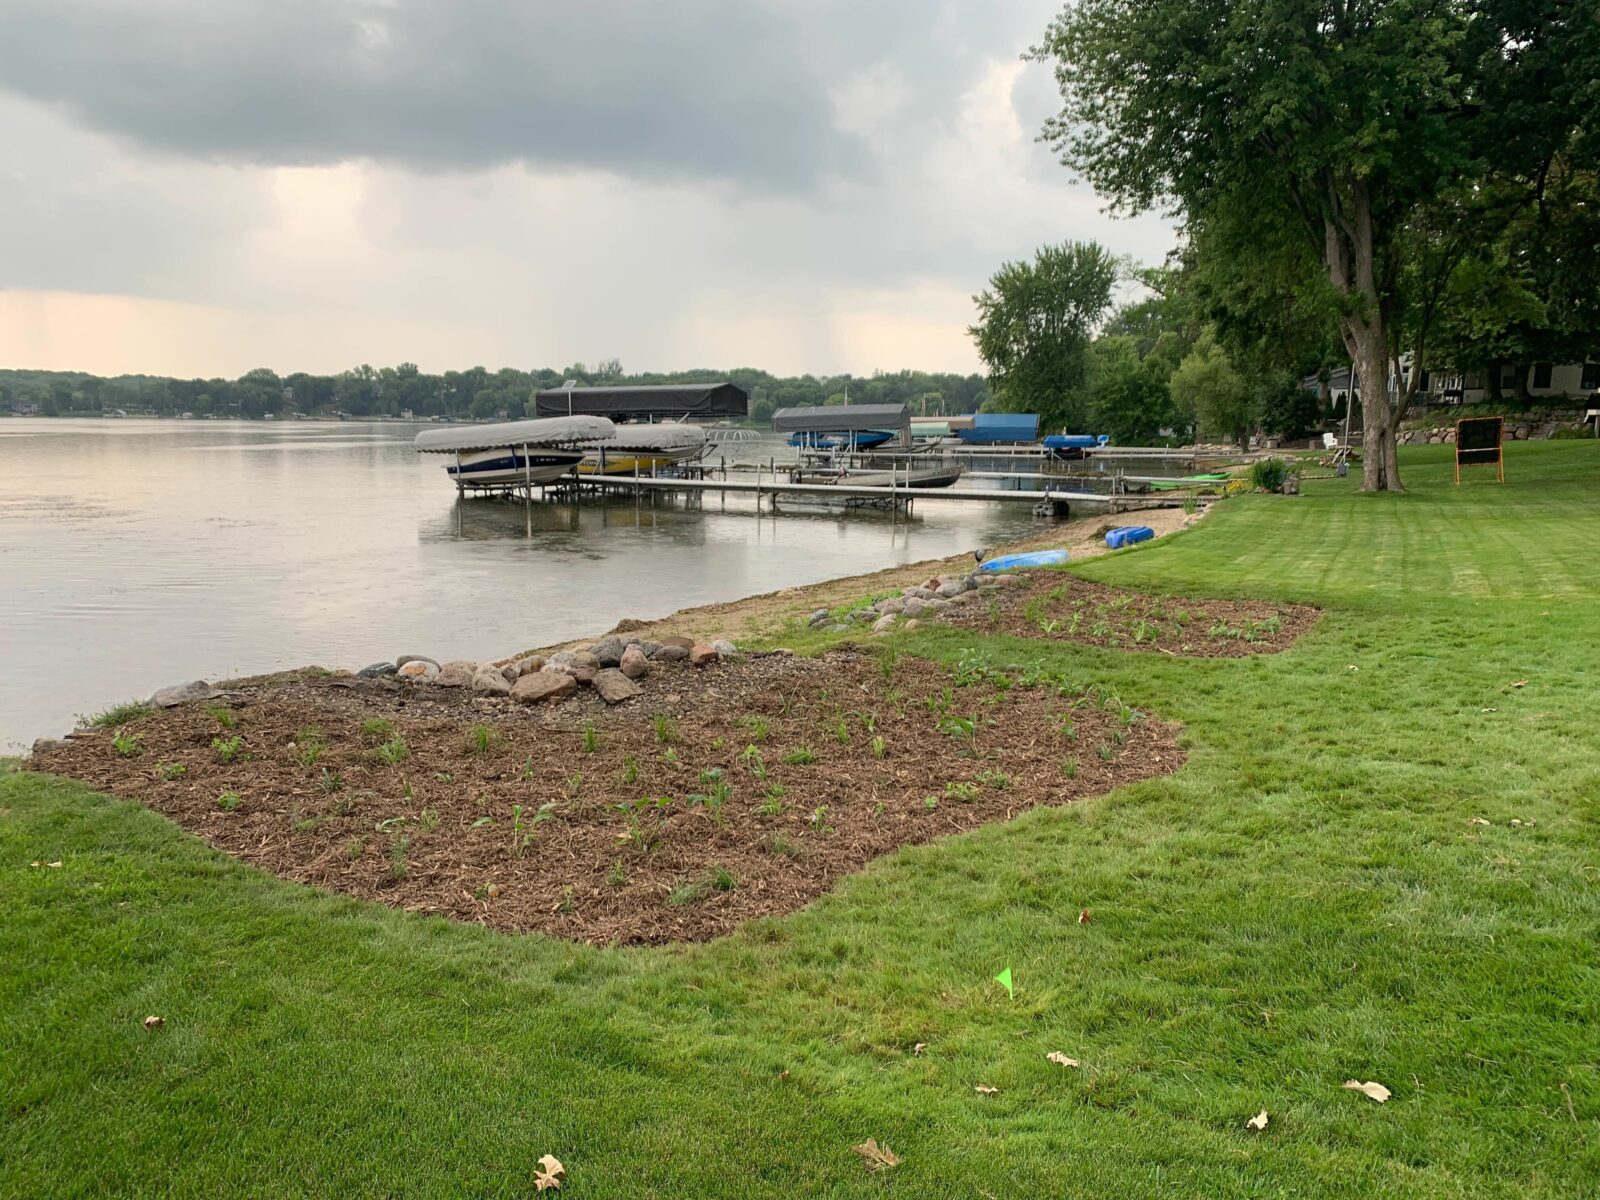
- Exposing bare soil will likely expose weed seeds that have been stored in the soil. As part of the preparation, you can choose to install mulch or weed suppression material. Mulching your site protects the soil from erosion and maintains the de-compacted soil you created. It is better to mulch before planting so you don’t damage delicate plugs as you’re spreading mulch.
- If your site is relatively flat, we recommend mulching your site with double-shredded hardwood mulch (available in bags or in bulk). This mulch doesn’t float like wood chips and it locks together more quickly, protecting your site better. If you have a sloped shoreline, you may need to use biodegradable erosion control blankets, as mulch could slough off into the lake.
Planting
Planting with Plugs
- Before planting, lay out the plants before you put them in the ground so that you’re happy with their spacing.
- Once you’re happy with the spacing, plant your first plug by moving the mulch out of the way to get access to the soil. With your trowel, dig about 3-4 inches down, as big as the size of your plug.
- Take your plant out of the container. If the roots are wrapped around, break them down and massage them so they’re not in a spiral position.
- Put your plug in the soil. Make sure it is sturdy and level with the ground. Bring all the soil on top, make sure it’s nice and snug. Bring the mulch back on top and repeat with your remaining plugs!
Maintaining your garden
A natural shoreline reduces maintenance time and costs when compared to conventional methods. However, maintenance for the first several years until well established is crucial for a successful project. During the first year, set a regular time to weed your planting and stick to it. If left untended, invasive non-natives generally establish a foothold or take over.
Watering
- For new planting, water a total of 1 inch twice a week, more during especially dry weeks. Watering frequency can be reduced to 1 inch once a week for second year plantings, and 1 inch during times of drought for established plantings. It’s better to water a longer time every few days rather than a little every day. This encourages your native plants to grow deeper roots and become more resilient to drought.
- You can use a rain gauge or even an old can marked at one inch to measure rainfall.
- The best time of day to water is in the morning while the ground is still cool, which helps water soak into the soil. Watering in the afternoon is less efficient as some water will be lost through heat and evaporation, and watering at night should be avoided as water tends to rest in the soil and encourages rot and pests.
Weeding
- Plan for a weekly half-hour weeding session during the first year of your pollinator garden, more time if your planting is larger. You can put labeled markers next to your native plants to help tell them apart from weeds. Light weeding every week or two will save you work in future seasons and is much easier than a heavy weeding session once a year. As your garden matures, weeding will become less demanding.
- You can remove weeds by pulling or digging. One of the best times to weed is a few hours after it rains, when water has had enough time to soak the soil. Grab the weed as low as you can and pull slowly to get all the roots. Do your best to minimize damage to neighboring desirable plants and fill in any holes left after digging. Bag and dispose of weed material—weeds left on the ground can root into the soil and grow back.
Shoreline-Specific Maintenance
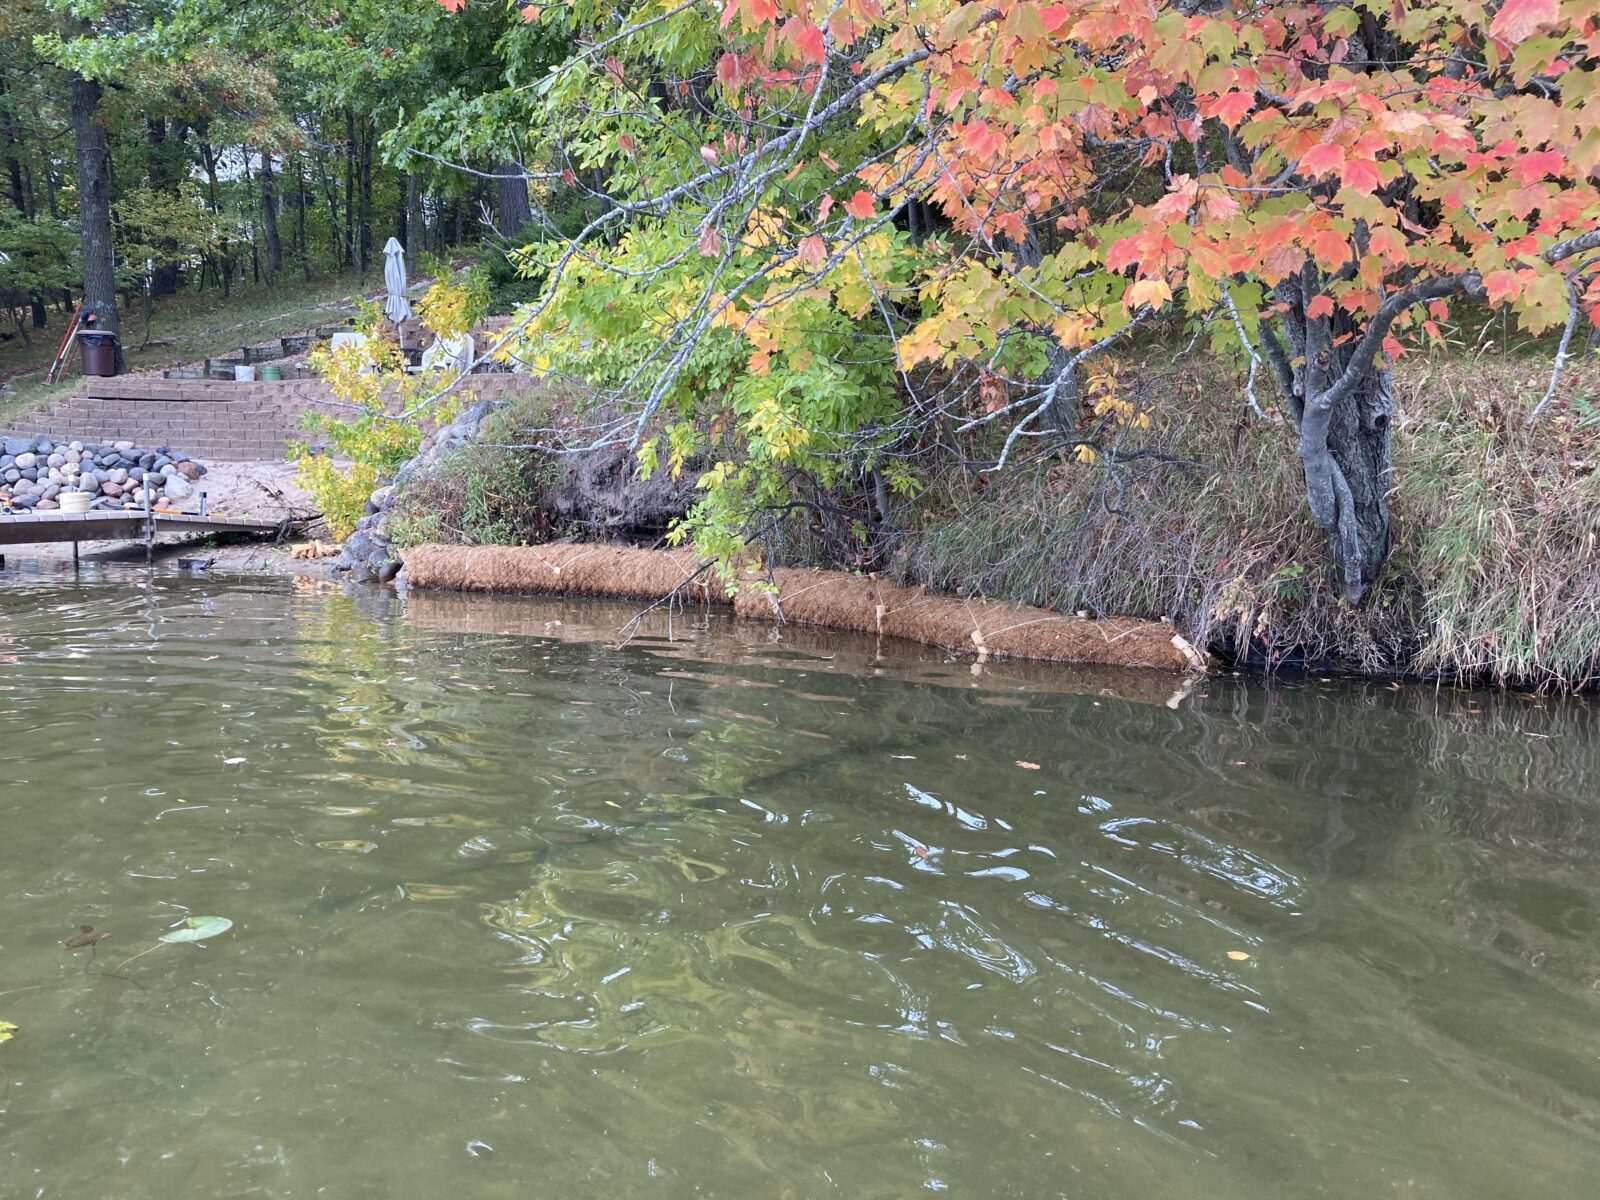
- Erosion control structures need ongoing inspection, and repair as necessary. After a big rainfall event, inspect any erosion control blankets, coir logs, or other installations to make sure they are functioning properly.
- Wavebreaks also need ongoing inspection and maintenance. If one was installed by your contractor, it will need to be removed in the fall and replaced in the following spring. We recommend using them for three years after installing an aquatic planting and then removing them permanently.
- Fencing and exclosures are critical if geese are a problem along your shoreline. Inspect them for functionality and use as necessary.
Give it patience! Native plant seeds may take months or years to germinate. Small plugs usually take 3 years to grow to maturity. Even larger plants can spend the first growing season establishing a strong root system before they fill out above the ground.
For more year-round maintenance information, check out the Resilient Yards Online Learning Series.
Shoreline stabilization resources
Go back to Plan a Project page
